|
This is a detailed description about the steps to be taken to setup a SUSE 9.3 based server that offers all services needed by ISPs and hosters (web server (SSL-capable), mail server (with SMTP-AUTH and TLS!), DNS server, FTP server, MySQL server, POP3/IMAP, Quota, Firewall, etc.). In addition to that I will show how to use Debian's package manager apt on an rpm-based system because it takes care of package dependencies automagically which can save a lot of trouble.
I will use the following software:
- Web Server: Apache 2.0.x
- Mail Server: Postfix (easier to configure than sendmail; has a shorter history of security holes than sendmail)
- DNS Server: BIND9
- FTP Server: proftpd (ISPConfig will not work with vsftpd on SUSE 9.2)
- POP3/IMAP: I will use Maildir format and therefore install Courier-POP3/Courier-IMAP.
- Webalizer for web site statistics
In the end you should have a system that works reliably and is ready for the free webhosting control panel ISPConfig (i.e., ISPConfig runs on it out of the box).
I want to say first that this is not the only way of setting up such a system. There are many ways of achieving this goal but this is the way I take. I do not issue any guarantee that this will work for you!
1. The Base System
Boot from your first SUSE 9.3-CD and select Installation from the boot screen:

Accept the license:

The SUSE installer (called YaST - Yet another Setup Tool) starts.
Select your language:

Skip the media check:

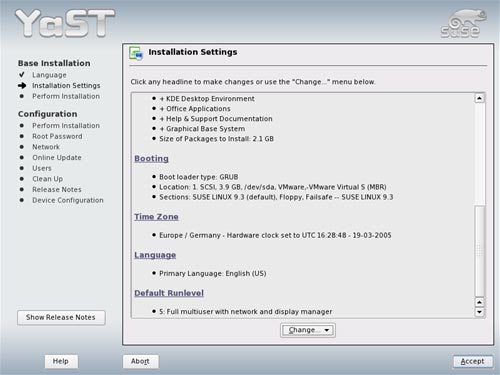
The installer analyzes your system and makes some automatic installation decicions which it lists on the following screen (Installation Settings). You can change each of its choices by navigating to the appropriate headline. First, I change the keyboard layout (I don't have an English (US) keyboard...):

I select my new keyboard layout and click on Accept:

Then I want to have a look at the partitioning. You can accept YaST's proposal or create your own partitions. In this case, I accept YaST's proposal. For my purposes one big /-partition and a swap partition are a good choice:

Next, I adjust the time zone:

Back on the Installation Settings screen, you can also choose the software you want to install if you know what you are doing. In this example, I will leave YaST's package choice unchanged. I will install the software I need to run a web/email/ftp server manually after the base installation has finished. So we click on Accept as we're done here:
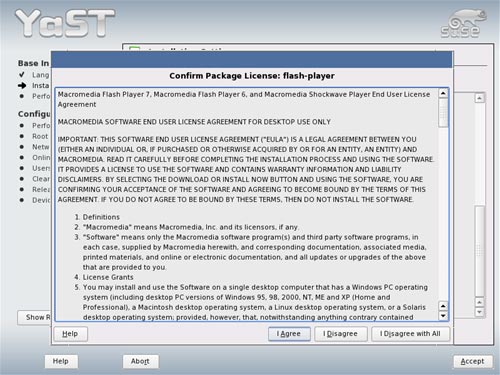
Accept the flash-player license next:
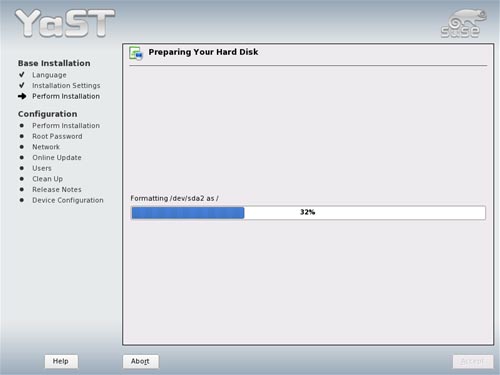
Click on Install:

The hard disk is being formatted:
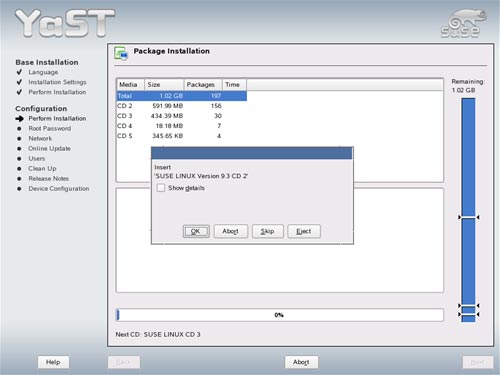
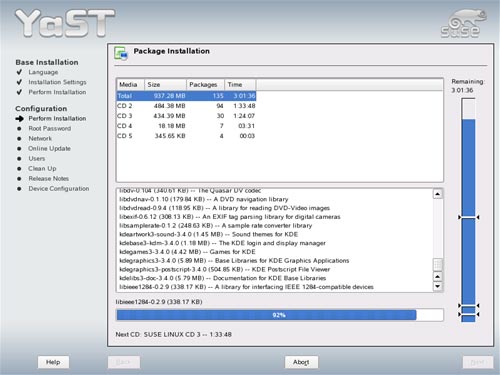
The package installation starts:

After the basic package installation the system reboots. Remove the SuSE CD and go sure to boot from the hard disk:


After the reboot, insert CD 2 and go on with the package installation:
After the package installation, you have to provide a password for root:

Now we do the network configuration. Take care to enable SSH:

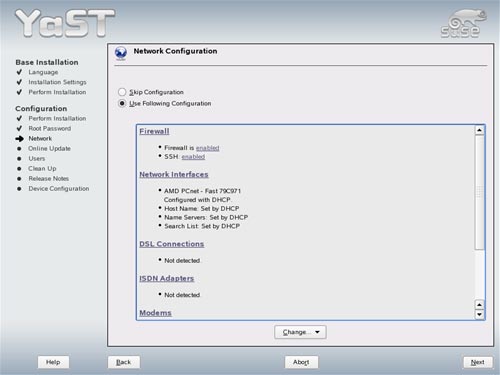
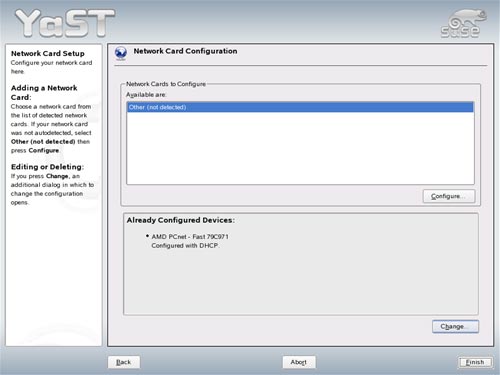
Then I click on Network Interfaces. On the next screen that appears, under Already Configured Devices, click on Change:
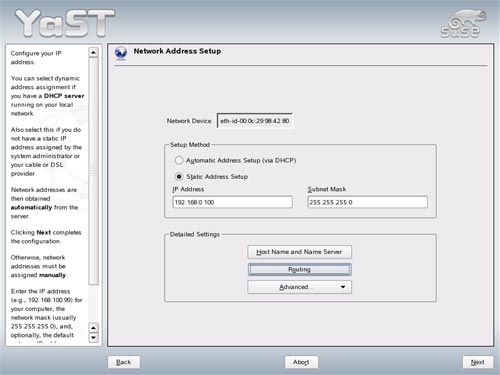
I do not want to get IP addresses from a DHCP server because a server should have static IP addresses so I change this by clicking on Edit:

Select Static Address Setup and enter an IP address (e.g. 192.168.0.100) and a subnet mask (e.g. 255.255.255.0):

Under Host Name and Name Server I set my hostname server1.example.com and enter up to 3 DNS servers (e.g. 145.253.2.75 and 193.174.32.18):

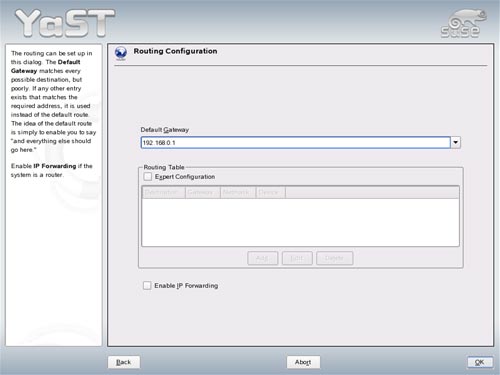
Under Routing I set my gateway (e.g. 192.168.0.1):
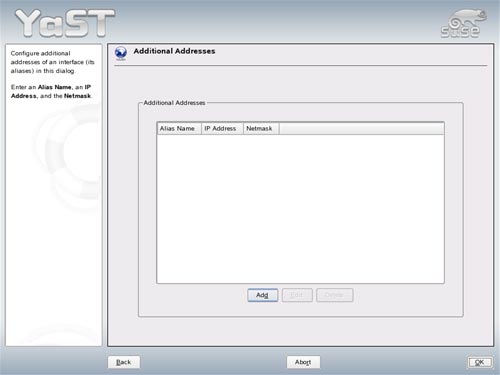
Under Advanced -> Additional Addresses you can set additional IP addresses.

I want to create a virtual network card eth0:0 with the IP address 192.168.0.101 (my main one is 192.168.0.100 in this
example) so I select Add:
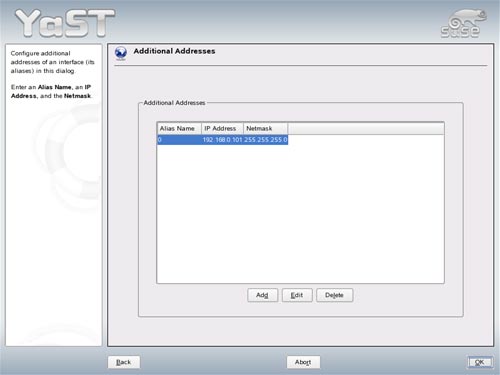
I enter an Alias Name (0), my additional IP address (192.168.0.101) and my
netmask (255.255.255.0):

Click on OK:
Then Next:

An overview of my network cards:

Back to the main Network Configuration
screen, and the Next:

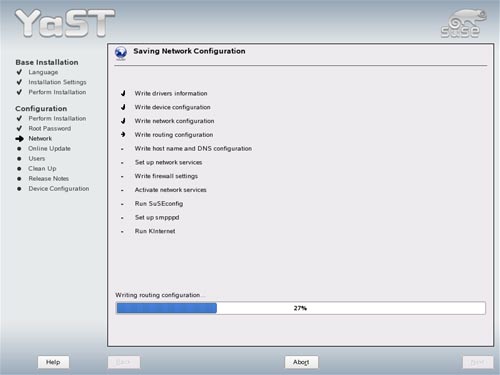
The network configuration is saved:
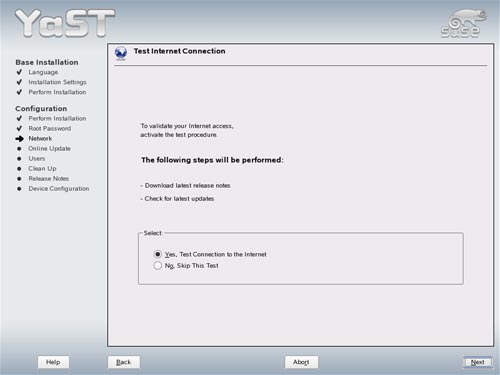
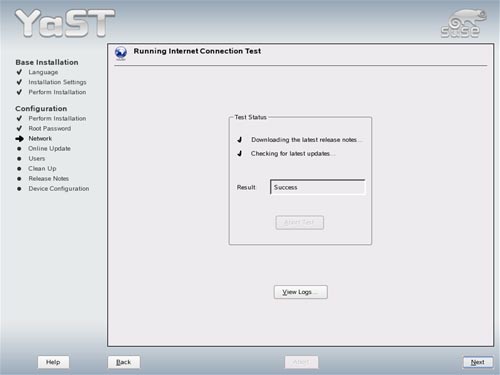
Now the internet connection of the system is tested:
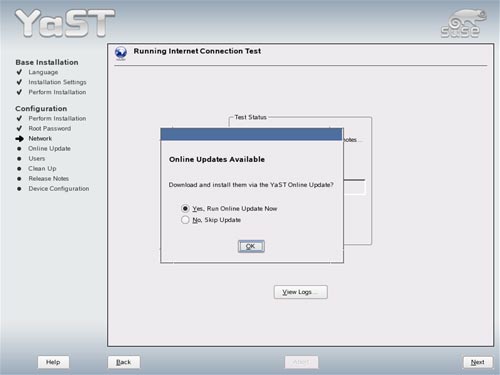
If you want the latest updates can be downloaded from a SUSE mirror and be installed:
When asked how users should authenticate choose Local (/etc/passwd):

Create a second user other than root (e.g. admin):

The system configuration gets written:

Read the release notes (if you like...) and click on Next:

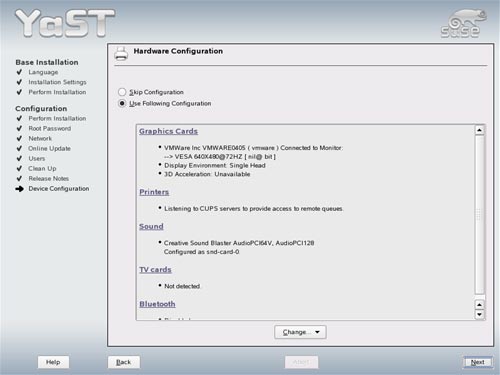
Finally YaST performs a hardware check (graphics cards, printers, Sound, TV cards and Bluetooth). You can accept the results of this check as this hardware is not important for a server.
Congratulations! Your base installation is complete.

On to the next step...
2. Installing And Configuring The Rest Of The System
Configure Additional IP Addresses
If you want to add more IP addresses to your system, simply run
yast2
The YaST Control Center will pop up. Go to Network
Devices -> Network Card. The next steps are the same as during the network setup in the installation.
Setting The Hostname
echo server1.example.com > /etc/hostname
/bin/hostname -F /etc/hostname
Install apt For SUSE
apt is the packaging system used on Debian. Since it cares much better for package dependencies than rpm it would be nice if we could use it on our new SUSE system. This would save us a lot of hassle. Fortunately, apt has been ported to a lot of rpm based distributions, and is also available for SUSE 9.3 (you will love it... :-)).
rpm -ivh ftp://ftp.gwdg.de/pub/linux/suse/apt/SuSE/9.3-i386/RPMS.suser-rbos/\
apt-libs-0.5.15cnc7-0.suse093.rb0.i586.rpm
rpm
-ivh
ftp://ftp.gwdg.de/pub/linux/suse/apt/SuSE/9.3-i386/RPMS.suser-rbos/\
apt-0.5.15cnc7-0.suse093.rb0.i586.rpm
Edit /etc/apt/sources.list. It should contain the following line:
rpm ftp://ftp.gwdg.de/pub/linux/suse/apt/ SuSE/9.3-i386 base update security
Run
apt-get update
Install Some Software And Deactivate SUSE's Firewall
apt-get install findutils ncftp readline libgcc glibc-devel findutils-locate gcc flex lynx compat-readline4 db-devel
/etc/init.d/SuSEfirewall2_setup stop
chkconfig --del SuSEfirewall2_setup
chkconfig --del SuSEfirewall2_init
Quota
apt-get install quota
Edit /etc/fstab to look like this (I added ,usrquota,grpquota to partition /dev/sda2
(mount point /; your device name might be /dev/hda2 or similar
)):
/dev/sda2            /                    reiserfs   acl,user_xattr,usrquota,grpquota        1 1
/dev/sda1            swap                 swap       pri=42                0 0
devpts               /dev/pts             devpts     mode=0620,gid=5       0 0
proc                 /proc                proc       defaults              0 0
usbfs                /proc/bus/usb        usbfs      noauto                0 0
sysfs                /sys                 sysfs      noauto                0 0
/dev/cdrecorder      /media/cdrecorder    subfs      noauto,fs=cdfss,ro,procuid,nosuid,nodev,exec,iocharset=utf8 0 0
/dev/fd0             /media/floppy        subfs      noauto,fs=floppyfss,procuid,nodev,nosuid,sync 0 0
Then run:
touch /aquota.user /aquota.group
chmod 600 /aquota.*
mount -o remount /
quotacheck
-avugm
quotaon -avug
DNS-Server
apt-get install bind bind-chrootenv bind-devel bind-utils
chkconfig --add named
/etc/init.d/named start
Bind will run in a chroot jail under /var/lib/named.
MySQL
apt-get install mysql mysql-client mysql-shared mysql-devel perl-DBD-mysql perl-DBI perl-Data-ShowTable
chkconfig --add mysql
/etc/init.d/mysql start
Now check that networking is enabled. Run
netstat -tap
It should show a
line like this:
tcp 0 0 *:mysql *:* LISTEN 6621/mysqld
If it does not, edit /etc/my.cnf, comment
out the option skip-networking:
# Don't listen on a TCP/IP port at all. This can be a security enhancement,
# if all processes that need to connect to mysqld run on the same host.
# All interaction with mysqld must be made via Unix sockets or named pipes.
# Note that using this option without enabling named pipes on Windows
# (via the "enable-named-pipe" option) will render mysqld useless!
#
#skip-networking
and restart your MySQL server:
/etc/init.d/mysql restart
Run
mysqladmin -u root password yourrootsqlpassword
to set a password for the user root (otherwise anybody can access your MySQL database!).
Postfix With SMTP-AUTH And TLS
apt-get install cyrus-sasl cyrus-sasl-crammd5 cyrus-sasl-devel cyrus-sasl-digestmd5 cyrus-sasl-gssapi cyrus-sasl-otp cyrus-sasl-plain cyrus-sasl-saslauthd
chkconfig --add saslauthd
/etc/init.d/saslauthd start
mkdir /etc/postfix/ssl
cd /etc/postfix/ssl/
openssl genrsa -des3 -rand /etc/hosts -out smtpd.key 1024
chmod 600 smtpd.key
openssl req -new -key smtpd.key -out smtpd.csr
openssl x509 -req -days 3650 -in smtpd.csr -signkey
smtpd.key -out smtpd.crt
openssl rsa -in smtpd.key -out smtpd.key.unencrypted
mv -f smtpd.key.unencrypted smtpd.key
openssl req
-new -x509 -extensions v3_ca -keyout cakey.pem -out cacert.pem -days 3650
postconf -e 'mydomain = example.com'
postconf -e 'myhostname = server1.$mydomain'
postconf -e
'smtpd_sasl_local_domain ='
postconf -e 'smtpd_sasl_auth_enable = yes'
postconf -e 'smtpd_sasl_security_options = noanonymous'
postconf -e 'broken_sasl_auth_clients = yes'
postconf -e 'smtpd_recipient_restrictions =
permit_sasl_authenticated,permit_mynetworks,check_relay_domains'
postconf -e 'inet_interfaces = all'
postconf -e 'alias_maps =
hash:/etc/aliases'
postconf -e 'smtpd_tls_auth_only = no'
postconf -e 'smtp_use_tls = yes'
postconf -e 'smtpd_use_tls = yes'
postconf -e 'smtp_tls_note_starttls_offer = yes'
postconf -e 'smtpd_tls_key_file = /etc/postfix/ssl/smtpd.key'
postconf -e 'smtpd_tls_cert_file = /etc/postfix/ssl/smtpd.crt'
postconf -e 'smtpd_tls_CAfile = /etc/postfix/ssl/cacert.pem'
postconf -e 'smtpd_tls_loglevel = 1'
postconf -e 'smtpd_tls_received_header = yes'
postconf -e 'smtpd_tls_session_cache_timeout = 3600s'
postconf -e 'tls_random_source = dev:/dev/urandom'
Now restart Postfix:
/etc/init.d/postfix restart
To see if SMTP-AUTH and TLS work properly now run the following command:
telnet localhost 25
After you have established the connection to your postfix mail server type
ehlo localhost
If you see the lines
250-STARTTLS
and 250-AUTH
everything is fine.
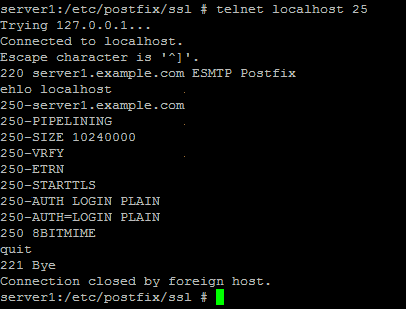
Type
quit
to return to the system's shell.
Courier-IMAP/Courier-POP3
I want to use a POP3/IMAP daemon that has Maildir support. That's why I use Courier-IMAP and Courier-POP3.
apt-get install courier-imap fam-server
/etc/init.d/courier-authdaemon start
/etc/init.d/courier-imap
start
/etc/init.d/courier-imap-ssl start
/etc/init.d/courier-pop3 start
/etc/init.d/courier-pop3-ssl start
chkconfig --add
courier-authdaemon
chkconfig --add courier-imap
chkconfig --add courier-imap-ssl
chkconfig --add courier-pop3
chkconfig --add
courier-pop3-ssl
Then configure Postfix to deliver emails to a user's Maildir*:
postconf -e 'home_mailbox = Maildir/'
postconf -e 'mailbox_command ='
/etc/init.d/postfix restart
*Please note: You do not have to do this if you intend to use ISPConfig on your system as ISPConfig does the necessary configuration using procmail recipes. But please go sure to enable Maildir under Management -> Settings ->
EMail in the ISPConfig web interface.
Apache/PHP5
apt-get install apache2 apache2-devel apache2-mod_perl apache2-mod_php5 apache2-prefork libapr0
perl-HTML-Parser perl-HTML-Tagset perl-Tie-IxHash perl-URI perl-libwww-perl php5
php5-devel
apt-get install php5-bcmath
php5-bz2 php5-calendar php5-ctype php5-curl php5-dba php5-dbase php5-dbx
php5-debuginfo php5-dio php5-dom php5-fam php5-filepro php5-ftp php5-gd
php5-gettext php5-gmp php5-iconv php5-imap php5-ldap php5-mbstring php5-mcrypt
php5-mhash php5-mysql php5-mysqli php5-ncurses php5-odbc php5-openssl php5-pcntl
php5-pgsql php5-posix php5-readline php5-shmop php5-snmp php5-soap php5-sockets
php5-sqlite php5-sysvsem php5-tokenizer php5-wddx php5-xmlrpc php5-xsl php5-yp
php5-zlib php5-exif php5-fastcgi php5-pear php5-sysvmsg php5-sysvshm ImageMagick
curl (1
line!)
chkconfig --add
apache2
Edit /etc/mime.types. Comment out the following 2 lines:
# application/x-httpd-php                phtml pht php
# application/x-perl             pl pm
Edit /etc/apache2/httpd.conf and change
DirectoryIndex index.html index.html.var
to
DirectoryIndex index.html index.htm
index.shtml index.cgi index.php index.php5 index.php4 index.php3 index.pl
index.html.var
Edit /etc/sysconfig/apache2 and add
rewrite to the APACHE_MODULES line:
APACHE_MODULES="access actions alias auth [...] setenvif ssl suexec userdir php4 php5 rewrite"
Also add SSL to the APACHE_SERVER_FLAGS
line:
APACHE_SERVER_FLAGS="SSL"
Then run
SuSEconfig
/etc/init.d/apache2
start
Proftpd
I want to use Proftpd instead of vsftpd which is SUSE's default FTP server because the control panel software I am going to install on this server (ISPConfig) requires Proftpd on SUSE
9.3 (on other distributions this is different). Since there are no SUSE packages for Proftpd I have to compile it manually:
cd /tmp/
wget --passive-ftp ftp://ftp.proftpd.org/distrib/source/proftpd-1.2.10.tar.gz
tar xvfz proftpd-1.2.10.tar.gz
cd proftpd-1.2.10/
./configure --sysconfdir=/etc
make
make install
cd ../
rm -fr proftpd-1.2.10*
Now create the file /etc/init.d/proftpd:
#! /bin/sh
# Copyright (c) 2000-2001 SuSE GmbH Nuernberg, Germany.
# All rights reserved.
#
# Original author: Marius Tomaschewski <mt@suse.de>
#
# Slightly modified in 2003 for use with SuSE Linux 8.1,
# by http://www.learnlinux.co.uk/
#
# Slightly modified in 2005 for use with SuSE Linux 9.2,
# by Falko Timme
#
# /etc/init.d/proftpd
#
### BEGIN INIT INFO
# Provides:                proftpd
# Required-Start:        $network $remote_fs $syslog $named
# Required-Stop:
# Default-Start:        3 5
# Default-Stop:        0 1 2 6
# Description:                Starts ProFTPD server
### END INIT INFO

# Determine the base and follow a runlevel link name.
base=${0##*/}
link=${base#*[SK][0-9][0-9]}

# Force execution if not called by a runlevel directory.
test $link = $base && START_PROFTPD=yes  # Modified by learnlinux.co.uk
test "$START_PROFTPD" = yes || exit 0    # Modified by learnlinux.co.uk

# Return values acc. to LSB for all commands but
# status (see below):
#
# 0 - success
# 1 - generic or unspecified error
# 2 - invalid or excess argument(s)
# 3 - unimplemented feature (e.g. "reload")
# 4 - insufficient privilege
# 5 - program is not installed
# 6 - program is not configured
# 7 - program is not running

proftpd_cfg="/etc/proftpd.conf"
proftpd_bin="/usr/local/sbin/proftpd"
proftpd_pid="/usr/local/var/proftpd.pid"

[ -r $proftpd_cfg ] || exit 6
[ -x $proftpd_bin ] || exit 5

# Source status functions
. /etc/rc.status

# First reset status of this service
rc_reset

case "$1" in
    start)
  echo -n "Starting ProFTPD Server: "
  test -f /etc/shutmsg && rm -f /etc/shutmsg
  /sbin/startproc $proftpd_bin
  rc_status -v
  ;;

    stop)
  echo -n "Shutting down ProFTPD Server: "
  test -x /usr/local/sbin/ftpshut && /usr/local/sbin/ftpshut now && sleep 1
  /sbin/killproc -TERM $proftpd_bin
  test -f /etc/shutmsg && rm -f /etc/shutmsg
  rc_status -v
  ;;

    restart)
  ## If first returns OK call the second, if first or
  ## second command fails, set echo return value.
  $0 stop
  $0 start
  rc_status
  ;;

    try-restart)
  ## Stop the service and if this succeeds (i.e. the
  ## service was running before), start it again.
  ## Note: not (yet) part of LSB (as of 0.7.5)
  $0 status >/dev/null &&  $0 restart
  rc_status
  ;;

    reload|force-reload)
  ## Exclusive possibility: Some services must be stopped
  ## and started to force a new load of the configuration.
  echo -n "Reload ProFTPD Server: "
  /sbin/killproc -HUP $proftpd_bin
  rc_status -v
  ;;

    status)
  # Status has a slightly different for the status command:
  # 0 - service running
  # 1 - service dead, but /var/run/  pid  file exists
  # 2 - service dead, but /var/lock/ lock file exists
  # 3 - service not running
  echo -n "Checking for ProFTPD Server: "
  checkproc $proftpd_bin
  rc_status -v
  ;;

    probe)
  ## Optional: Probe for the necessity of a reload,
  ## give out the argument which is required for a reload.
  [ $proftpd_cfg -nt $proftpd_pid ] && echo reload
  ;;

    *)
  echo "Usage: $0 {start|stop|status|restart|reload|try-restart|probe}"
  exit 1
  ;;
esac

# Set an exit status.
rc_exit
chmod 755
/etc/init.d/proftpd
chkconfig --add proftpd
/etc/init.d/proftpd
start
For security
reasons you can add the following lines to /etc/proftpd.conf:
DefaultRoot ~
IdentLookups off
ServerIdent on "FTP Server ready."
Be sure to comment
out the following lines in order to allow ftp users to CHMOD:
# Bar use of SITE CHMOD by default
# <Limit SITE_CHMOD>
#  DenyAll
# </Limit>
and restart
Proftpd:
/etc/init.d/proftpd
restart
Webalizer
To install
webalizer, just run
apt-get install webalizer
Synchronize the System Clock
If you want to have the system clock synchronized with an NTP server do the following:
apt-get install netdate
netdate tcp 128.2.136.71
Create /var/spool/cron/tabs/root:
# update time with ntp server0 3,9,15,
21 * * * /usr/sbin/netdate 128.2.136.71
Then run
chmod 600 /var/spool/cron/tabs/root
/etc/init.d/cron restart
Install some Perl Modules needed by SpamAssassin (comes with ISPConfig)
Installation using the Perl Shell
Login to your command line as root and run the following command to start the Perl shell:
perl -MCPAN -e shell
If you run the Perl shell for the first time you will be asked some questions. In most cases the default answers are ok.
Please note: If you run a firewall on your system you might have to turn it off while working on the Perl shell in order for the Perl shell to be able to fetch the needed modules without a big delay. You can switch it on afterwards.
The big advantage of the Perl shell compared to the two other methods described here is that it cares about dependencies when installing new modules. I.e., if it turns out that a prerequisite Perl module is missing when you install another module the Perl shell asks you if it should install the prerequisite module for you. You should answer that question with "Yes".
Run the following commands to install the modules needed by SpamAssassin:
install HTML::Parser
install Net::DNS (when prompted to enable
tests, choose no)
install Digest::SHA1
install DB_File
q (to leave the Perl shell)
If a module is already installed on your system you will get a message similar to this one:
HTML::Parser is up to date.
Successful installation of a module looks like this: /usr/bin/make install -- OK
The End
The configuration of the server is now finished, and if you wish you can now install ISPConfig on it.
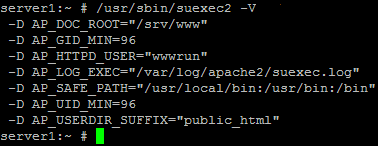
A Note On SuExec
If you want to run CGI scripts under suExec, you should specify /srv/www as the home directory for websites created by ISPConfig as SUSE 9.3's suExec is compiled with /srv/www as Doc_Root. Run /usr/sbin/suexec2 -V, and the output should look like this:
To select /srv/www as the home directory for websites during the installation of ISPConfig do the following: When you are
asked for the installation mode, select the expert mode.

Later during the installation you are asked if the default directory /home/www should be the directory where ISPConfig will create websites in. Answer n and enter /srv/www as the home directory for websites.

| 


