|
Version
1.2
Author: Till Brehm
Last edited:
03/09/2006
This is a
detailed description about the steps to be taken to setup a OpenSUSE
10.0 based server that offers all services needed by ISPs and hosters
(web server (SSL-capable), mail server (with SMTP-AUTH and TLS!), DNS
server, FTP server, MySQL server, POP3/IMAP, Quota, Firewall, etc.) and
the ISPConfig control panel.
I will use
the following software:
- Web
Server: Apache 2.0.x
- Mail
Server: Postfix (easier to configure than sendmail; has a shorter
history of security holes than sendmail)
- DNS
Server: BIND9
- FTP
Server: proftpd (ISPConfig will not work with vsftpd on OpenSUSE
10.0)
- POP3/IMAP:
I will use Maildir format and therefore install
Courier-POP3/Courier-IMAP.
- Webalizer
for web site statistics
In the end
you should have a system that works reliably and is ready for the free
webhosting control panel ISPConfig (i.e., ISPConfig runs on it out of the
box).
I want to say
first that this is not the only way of setting up such a system. There are
many ways of achieving this goal but this is the way I take. I do not
issue any guarantee that this will work for you!
Requirements
To install
such a system you will need the following:
- OpenSUSE
10.0.
- an
internet connection...
1 The Base
System
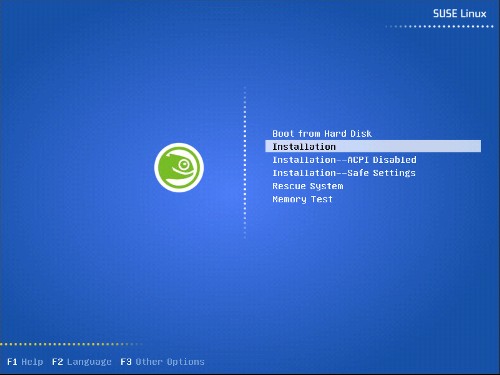
Boot from
your first OpenSUSE 10-CD and select Installation from the boot
screen:
SuSe Linux is
booting, to see a more detailed booting progress press Escape:

Select your
language:

Skip the
media check by clicking on Next:

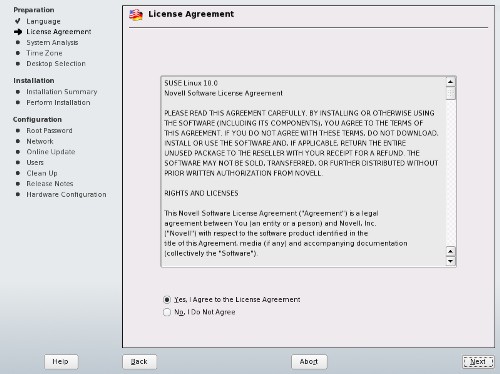
Accept the
licence agreement:
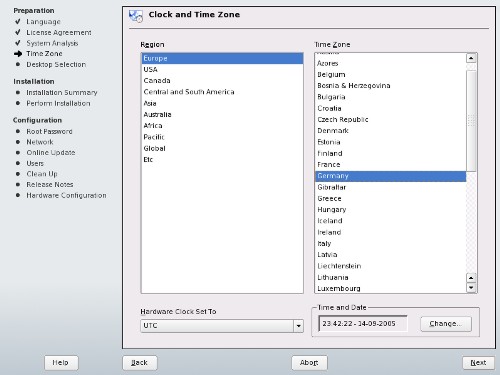
The installer
analyzes your system. Select your time zone
next:
Select Other and click on
Select...:
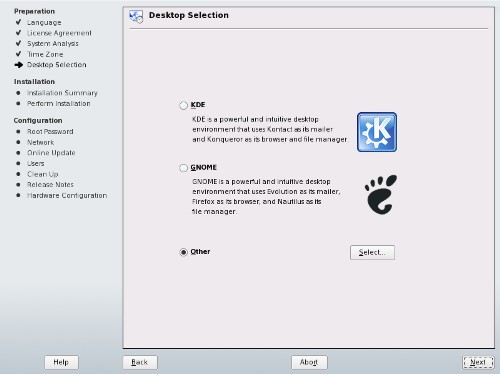
For a server
setup, I select Text
Mode and go with NextInstallation
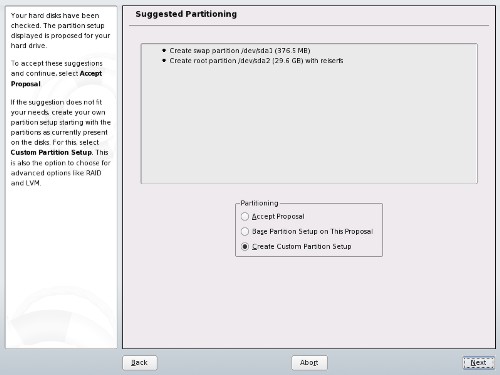
Settings). You can change each of its choices by navigating to
the appropriate headline. First, I change the partitioning
scheme:

Click on
Partitioning and
then on Create Custom Partition
Setup and click Next:

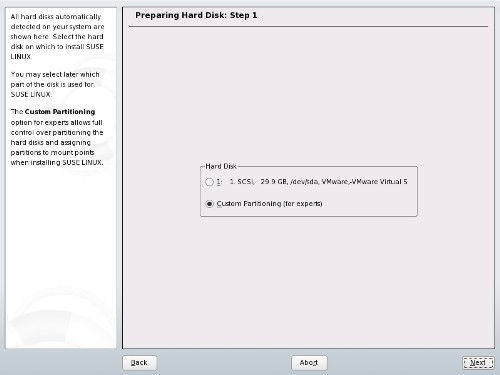
Select
Custom Partitioning (for
experts):
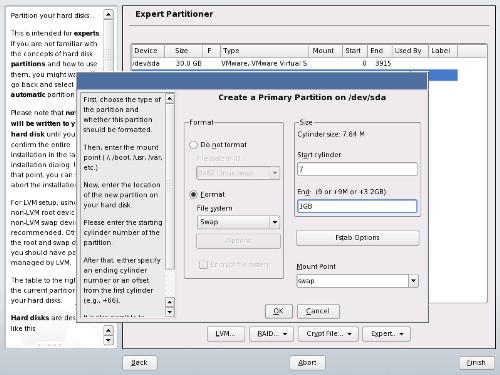
Now we create
the partitions. I will use the following partition scheme:
/boot 50
MB
/swap 1GB
/ 10 GB
/var the rest of the hard disk
Creating a
partition: Click on create, select primary partition, select the format. I
will use EXT3 for all partitions except the swap partition, that is of
type swap. Then select the mountpoint corresponding to the above
partitioning scheme.
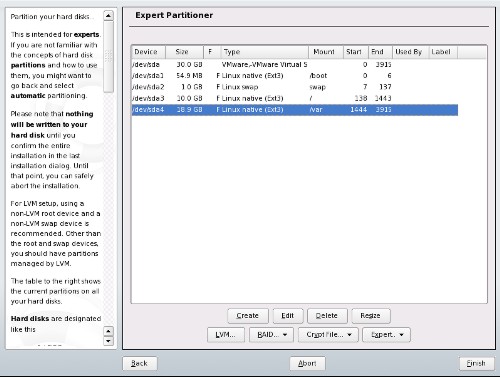
Your
partition table should look now similar to this one here, depending on
your hard disk size. Click on Finish to proceed to the next
step.
ISP Server Setup - OpenSUSE 10 - Page
2
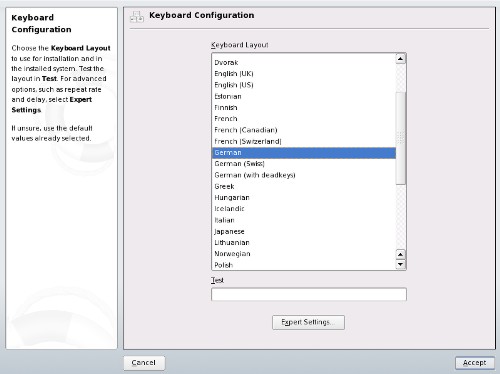
Now I've
switched to Expert
mode (the Expert
tab in the Installation
Settings), selected my Keyboard Layout and Accept:

Back on the
Installation
Settings screen, click on Accept and then on Install:

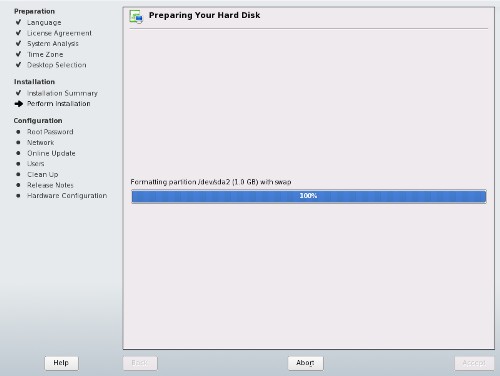
The hard
disk is being formatted:
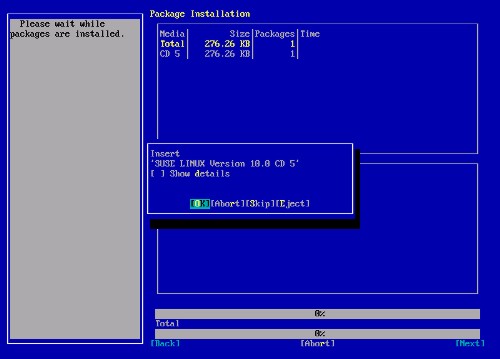
The package
installation starts (Click on the Details tab to see the
detailed installation progress):

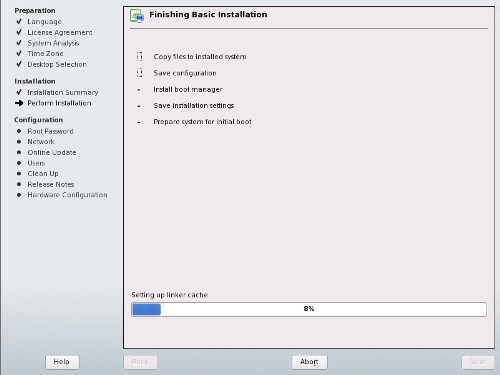
After the
basic package installation the system reboots. Remove the OpenSuSE CD
and go sure to boot from the hard disk:

After the
package installation, you have to provide a password for root. Then hit the [Tab]
key until the Next
is highlighted and hit return.

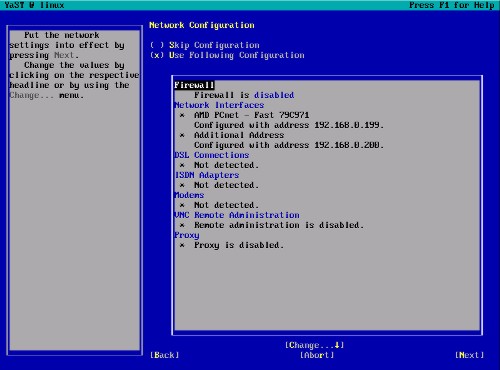
First we
disable the default firewall. This is nescessary to prepare the system
for the ISPConfig installation. ISPConfig provides its own firewall. If
you do not want to install ISPConfig, leave the firewall enabled. To
navigate in text-mode use the tab and arrow keys. Enable or disable
selections by hitting the return key.

ISP Server Setup - OpenSUSE 10 - Page
3
Now we do
the network configuration. Hit the [Tab] key until the window with the
settings is highlighted, then hit the cursor keys until Network Interfaces is
highlighted and hit return.
On the next
screen that appears, hit the [Tab] key until [Edit] is highlighted, then
hit return:
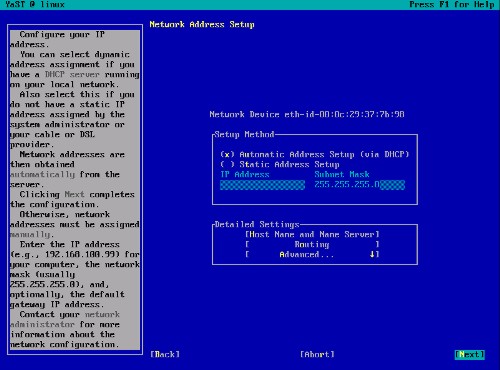
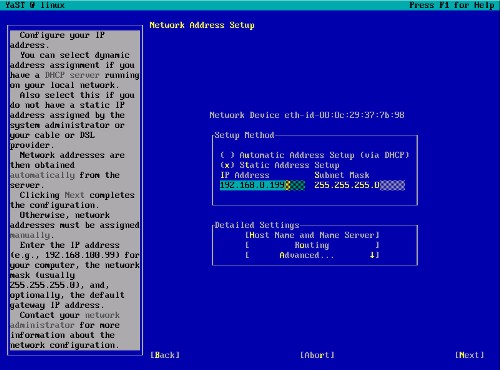
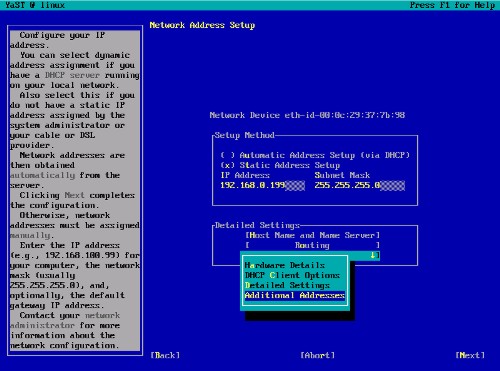
I do not
want to get IP addresses from a DHCP server because a server should have
static IP addresses so I change this by selecting Static Address Setup and
enter an IP
Address (e.g. 192.168.0.199) and a
Subnet Mask (e.g.
255.255.255.0):
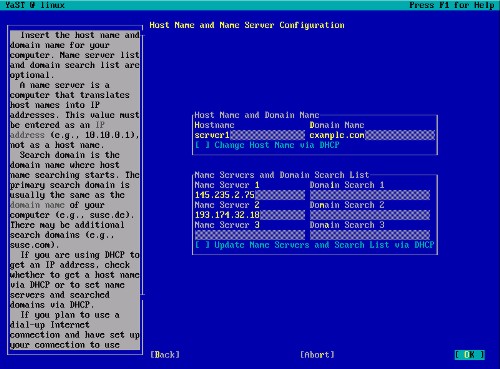
Under
Host Name and Name Server
Configuration I set my hostname server1.example.com and
enter up to 3 DNS servers (e.g. 145.253.2.75193.174.32.18):
Under
Routing Configuration
I set my gateway (e.g. 192.168.0.1):

Under
Advanced -> Additional
Addresses you can set additional IP addresses. I want to create a
virtual network card eth0:0 with the IP address
192.168.0.200 (my
main one is 192.168.0.199 in this
example) so I select Additional
Addresses:

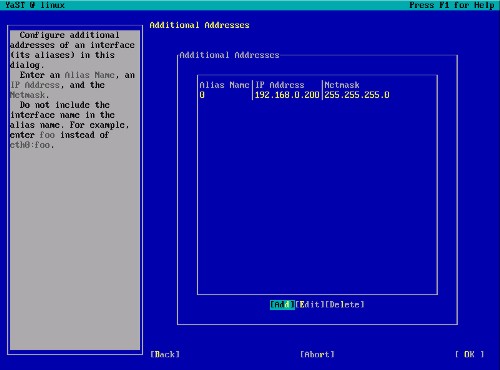
I enter an
Alias Name
(0), my additional
IP address (192.168.0.200) and my
netmask (255.255.255.0):

Click on
OK, then OK again:
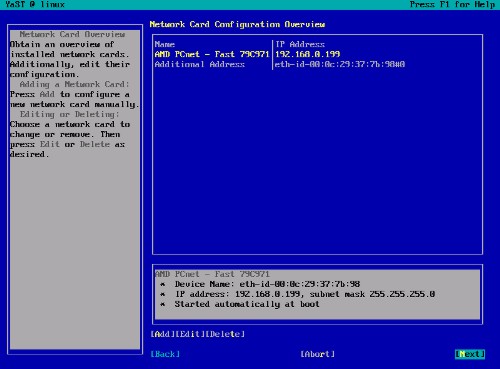
Back to the
main Network
Configuration screen, and then Next:
The network
configuration is being saved:
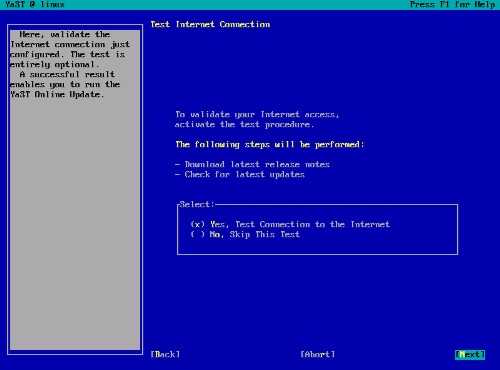
Now the
internet connection of the system is tested and you may download the
latest updates from a SUSE mirror and install them:
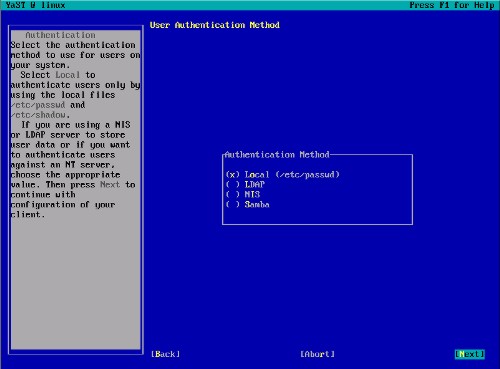
When asked
how users should authenticate choose Local
(/etc/passwd):
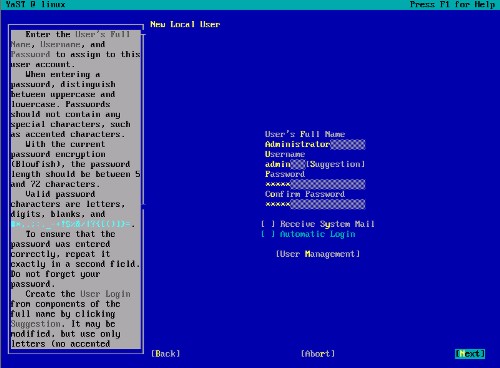
Create a
second user other than root (e.g. admin):
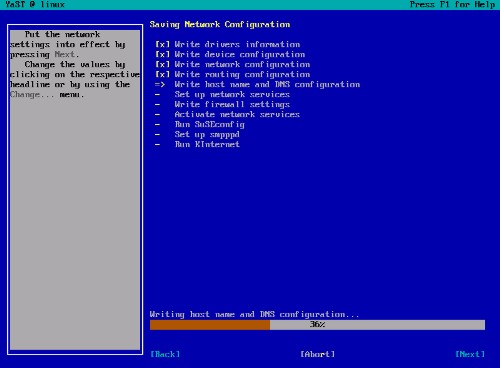
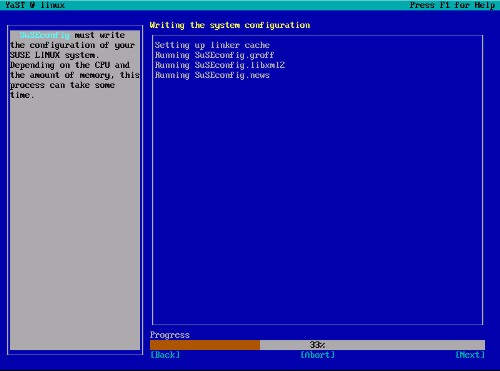
The system
configuration gets written:
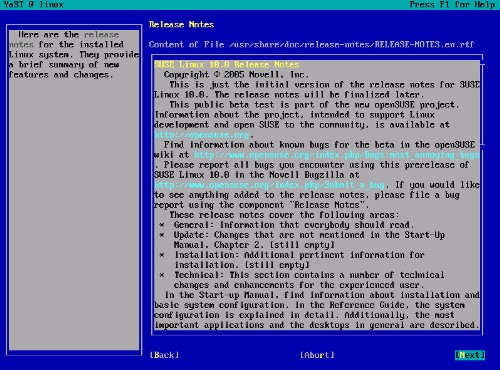
Read the
release notes (if you like...) and select Next + hit
Enter:
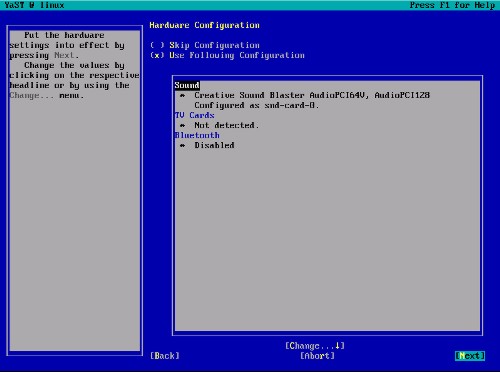
Finally
YaST performs a hardware check (graphics cards, printers, sound, TV
cards and Bluetooth). You can accept the results of this check as this
hardware is not important for a server.
Congratulations! Your base installation is complete.

On to the
next step...
ISP Server Setup - OpenSUSE 10 - Page
4
2 Installing And
Configuring The Rest Of The System
Now I can
login on the console and enable the SSH daemon:
chkconfig
--add sshd
/etc/init.d/sshd
start
Now I can
login remotely with an SSH Client like Putty and make the 2nd part of
the installation.
Configure Additional IP Addresses
If you want
to add more IP addresses to your system, simply run
yast2
The YaST
Control Center will pop up. Go to Network Devices -> Network
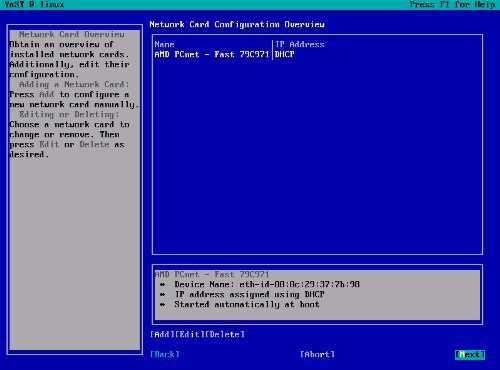
Card. The next steps are the same as during the network setup
in the installation.
Setting
The Hostname
/bin/hostname -F
/etc/hostname
Adding Installation Sources
To make
package installation easier, I will add a network installation source.
If you want to install all packages from CD / DVD, you can skip this
step. Start yast2:
yast2
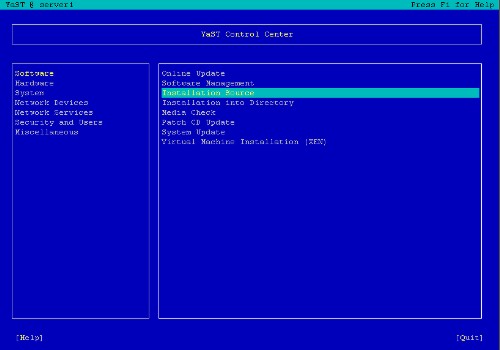
Select
Installation
Source, then Add and enter a mirror near
you. You can find a list of mirrors here: http://www.opensuse.org/Mirrors_Development_Build.
I selected
this http mirror ( yes, it is an http mirror even though the URL starts
with ftp :-) ):
ftp.uni-erlangen.de/pub/mirrors/opensuse/distribution/SL-10.0-OSS/inst-source

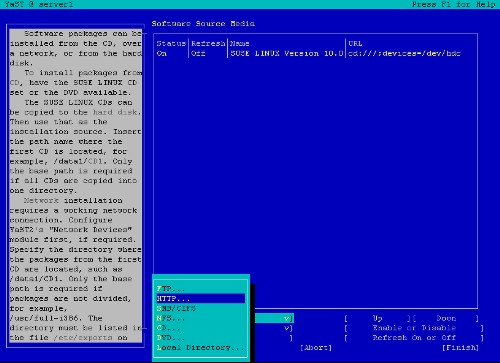
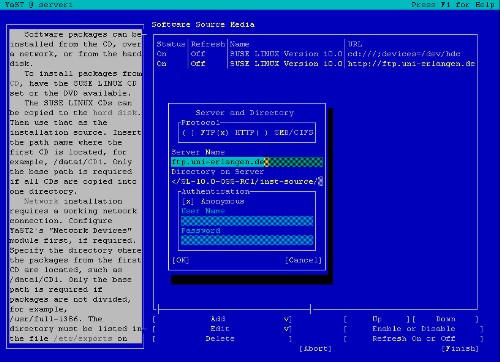
Then change
the order of the installation sources, so that your new source is at the
top. Then select Finish and Quit.

Install Some
Software
yast -i findutils
readline libgcc glibc-devel findutils-locate gcc flex lynx
compat-readline4 db-devel wget
If you're on a
64-bit system (only then!), you must also install openssl-devel-32bit:
yast -i
openssl-devel-32bit
Quota
yast -i
quota
Edit
/etc/fstab to look
like this (I added ,usrquota,grpquota to
partition /dev/sda3
(mount point /; your device name might
be ) and
to /dev/sda4 (mount
point
/var)):
/dev/sda3            /                    ext3       acl,user_xattr,usrquota,grpquota        1 1
/dev/sda1            /boot                ext3       acl,user_xattr        1 2
/dev/sda4            /var                 ext3       acl,user_xattr,usrquota,grpquota        1 2
/dev/sda2            swap                 swap       defaults              0 0
proc                 /proc                proc       defaults              0 0
sysfs                /sys                 sysfs      noauto                0 0
usbfs                /proc/bus/usb        usbfs      noauto                0 0
devpts               /dev/pts             devpts     mode=0620,gid=5       0 0
/dev/dvdram          /media/dvdram        subfs      noauto,fs=cdfss,ro,procuid,nosuid,nodev,exec,iocharset=utf8 0 0
/dev/fd0 /media/floppy subfs noauto,fs=floppyfss,procuid,nodev,nosuid,sync 0 0 |
Then
run:
touch
/aquota.user /aquota.group
chmod 600 /aquota.*
mount -o remount
/
touch /var/aquota.user /var/aquota.group
chmod 600
/var/aquota.*
mount -o remount /var
quotacheck
-avugm
You will
get this warning when running quotacheck the first time. Don't worry
about it.
quotacheck: WARNING - Quotafile
//aquota.user was probably truncated. Can't save quota
settings...
quotacheck: WARNING - Quotafile //aquota.group was
probably truncated. Can't save quota settings...
Then
run:
quotaon
-avug
DNS-Server
yast -i bind
bind-chrootenv bind-devel bind-utils
chkconfig --add
named
/etc/init.d/named start
Bind will
run in a chroot jail under /var/lib/named.
MySQL
yast -i mysql
mysql-client mysql-shared perl-DBD-mysql perl-DBI perl-Data-ShowTable
mysql-devel
chkconfig
--add mysql
/etc/init.d/mysql start
netstat
-tap
It should
show a line like this:
tcp 0 0 *:mysql *:* LISTEN 6621/mysqld |
If it does
not, edit /etc/my.cnf, comment out
the option skip-networking:
# Don't listen on a TCP/IP port at all. This can be a security enhancement,
# if all processes that need to connect to mysqld run on the same host.
# All interaction with mysqld must be made via Unix sockets or named pipes.
# Note that using this option without enabling named pipes on Windows
# (via the "enable-named-pipe" option) will render mysqld useless!
#
#skip-networking |
and restart
your MySQL server:
/etc/init.d/mysql
restart
Run
mysqladmin -u root
password yourrootsqlpassword
to set a
password for the user root (otherwise anybody can
access your MySQL database!).
Postfix
With SMTP-AUTH And TLS
yast -i cyrus-sasl
cyrus-sasl-crammd5 cyrus-sasl-digestmd5 cyrus-sasl-gssapi cyrus-sasl-otp
cyrus-sasl-plain cyrus-sasl-saslauthd
chkconfig --add
saslauthd
/etc/init.d/saslauthd start
mkdir
/etc/postfix/ssl
cd /etc/postfix/ssl/
openssl genrsa -des3 -rand
/etc/hosts -out smtpd.key 1024
chmod 600 smtpd.key
openssl req
-new -key smtpd.key -out smtpd.csr
openssl x509 -req -days 3650 -in
smtpd.csr -signkey smtpd.key -out smtpd.crt
openssl rsa -in smtpd.key
-out smtpd.key.unencrypted
mv -f smtpd.key.unencrypted
smtpd.key
openssl req -new -x509 -extensions v3_ca -keyout cakey.pem
-out cacert.pem -days 3650
postconf -e
'mydomain = example.com'
postconf -e 'myhostname =
server1.$mydomain'
postconf -e 'smtpd_sasl_local_domain
='
postconf -e 'smtpd_sasl_auth_enable = yes'
postconf -e
'smtpd_sasl_security_options = noanonymous'
postconf -e
'broken_sasl_auth_clients = yes'
postconf -e
'smtpd_recipient_restrictions =
permit_sasl_authenticated,permit_mynetworks,check_relay_domains'
postconf
-e 'inet_interfaces = all'
postconf -e 'alias_maps =
hash:/etc/aliases'
postconf -e 'smtpd_tls_auth_only = no'
postconf
-e 'smtp_use_
-e 'smtp_tls_note_starttls_offer = yes'
postconf -e
'smtpd_tls_key_file = /etc/postfix/ssl/smtpd.key'
postconf -e
'smtpd_tls_cert_file = /etc/postfix/ssl/smtpd.crt'
postconf -e
'smtpd_tls_CAfile = /etc/postfix/ssl/cacert.pem'
postconf -e
'smtpd_tls_loglevel = 1'
postconf -e 'smtpd_tls_received_header =
yes'
postconf -e 'smtpd_tls_session_cache_timeout =
3600s'
postconf -e 'tls_random_source =
dev:/dev/urandom'
To enable
tls connections in postfix, edit /etc/postfix/master.cf and uncomment
the line:
#tlsmgr unix - - n 1000? 1 tlsmgr |
Now restart
Postfix:
/etc/init.d/postfix
restart
To see if
SMTP-AUTH and TLS work properly now run the following
command:
telnet localhost
25
After you
have established the connection to your postfix mail server
type
ehlo localhost
If you see
the lines
250-STARTTLS
and
250-AUTH
then
everything is fine.

Type
quit
to return
to the system's shell.
Courier-IMAP/Courier-POP3
I want to
use a POP3/IMAP daemon that has Maildir support. That's why I use
Courier-IMAP and Courier-POP3.
yast -i
courier-imap fam-server courier-authlib expect tcl
chkconfig --add
fam
chkconfig --add courier-authdaemon
chkconfig --add
courier-pop
chkconfig --add courier-imap
/etc/init.d/courier-pop
start
/etc/init.d/courier-imap start
postconf -e
'home_mailbox = Maildir/'
postconf -e 'mailbox_command
='
/etc/init.d/postfix restart
*Please
note: You do not have to do this if you intend to use ISPConfig on your
system as ISPConfig does the necessary configuration using procmail
recipes. But please go sure to enable Maildir under Management -> Settings ->
EMail in the ISPConfig web interface.
ISP Server Setup - OpenSUSE 10 - Page
5
Apache/PHP5
yast2 -i apache2
apache2-devel apache2-mod_perl apache2-mod_php5 apache2-prefork libapr0
perl-HTML-Parser perl-HTML-Tagset perl-Tie-IxHash perl-URI
perl-libwww-perl php5 php5-devel zlib zlib-devel
yast2 -i
php5-bcmath php5-bz2 php5-calendar php5-ctype php5-curl php5-dbase
php5-dbx php5-debuginfo php5-dio php5-dom php5-fam php5-filepro php5-ftp
php5-gd php5-gettext php5-gmp php5-iconv php5-imap php5-ldap
php5-mbstring php5-mcrypt php5-mhash php5-mysql php5-mysqli php5-ncurses
php5-odbc php5-openssl php5-pcntl php5-pgsql php5-posix php5-shmop
php5-snmp php5-soap php5-sockets php5-sqlite php5-sysvsem php5-tokenizer
php5-wddx php5-xmlrpc php5-xsl php5-yp php5-zlib php5-exif php5-fastcgi
php5-pear php5-sysvmsg php5-sysvshm ImageMagick curl (1
line!)
chkconfig --add
apache2
ISPConfig
configures the perl and PHP mimetypes on a per vhost basis, so we
comment them out in the global setup.
Edit /etc/mime.types. Comment
out the following 2 lines:
# application/x-httpd-php                phtml pht php
# application/x-perl pl pm |
Edit
/etc/apache2/httpd.conf and
change
DirectoryIndex index.html
index.html.var
to
DirectoryIndex index.html index.htm
index.shtml index.cgi index.php index.php5 index.php4 index.php3
index.pl index.html.var index.aspx
default.aspx
Edit
/etc/sysconfig/a
add rewrite to the
APACHE_MODULES
line:
APACHE_MODULES="access actions alias auth [...] setenvif ssl suexec userdir php4 php5 rewrite" |
Also add
SSL to the
APACHE_SERVER_FLAGS
line:
APACHE_SERVER_FLAGS="SSL" |
Then
run
SuSEconfig
/etc/init.d/apache2
start
Proftpd
I want to
use Proftpd
instead of vsftpd
which is SUSE's default FTP server because the control panel software I
am going to install on this server (ISPConfig) requires Proftpd on SUSE 10.0 (on
other distributions this is different). Since there are no SUSE packages
for Proftpd I have
to compile it manually:
cd /tmp/
wget
--passive-ftp
ftp://ftp.proftpd.org/distrib/source/proftpd-1.2.10.tar.gz
tar xvfz
proftpd-1.2.10.tar.gz
cd proftpd-1.2.10/
./configure
--sysconfdir=/etc
make
make install
cd ../
rm -fr
proftpd-1.2.10*
Now create
the file /etc/init.d/proftpd:
#! /bin/sh
# Copyright (c) 2000-2001 SuSE GmbH Nuernberg, Germany.
# All rights reserved.
#
# Original author: Marius Tomaschewski <mt@suse.de>
#
# Slightly modified in 2003 for use with SuSE Linux 8.1,
# by http://www.learnlinux.co.uk/
#
# Slightly modified in 2005 for use with SuSE Linux 9.2,
# by Falko Timme
#
# /etc/init.d/proftpd
#
### BEGIN INIT INFO
# Provides:                proftpd
# Required-Start:        $network $remote_fs $syslog $named
# Required-Stop:
# Default-Start:        3 5
# Default-Stop:        0 1 2 6
# Description:                Starts ProFTPD server
### END INIT INFO

# Determine the base and follow a runlevel link name.
base=${0##*/}
link=${base#*[SK][0-9][0-9]}

# Force execution if not called by a runlevel directory.
test $link = $base && START_PROFTPD=yes  # Modified by learnlinux.co.uk
test "$START_PROFTPD" = yes || exit 0    # Modified by learnlinux.pd_cfg ] || exit 6
[ -x $proftpd_bin ] || exit 5

# Source status functions
. /etc/rc.status

# First reset status of this service
rc_reset

case "$1" in
    start)
  echo -n "Starting ProFTPD Server: "
  test -f /etc/shutmsg && rm -f /etc/shutmsg
  /sbin/startproc $proftpd_bin
  rc_status -v
  ;;

    stop)
  echo -n "Shutting down ProFTPD Server: "
  test -x /usr/local/sbin/ftpshut && /usr/local/sbin/ftpshut now && sleep 1
  /sbin/killproc -TERM $proftpd_bin
  test -f /etc/shutmsg && rm -f /etc/shutmsg
  rc_status -v
  ;;

    restart)
  ## If first returns OK call the second, if first or
  ## second command fails, set echo return value.
  $0 stop
  $0 start
  rc_status
  ;;

    try-restart)
  ## Stop the service and if this succeeds (i.e. the
  ## service was running before), start it again.
  ## Note: not (yet) part of LSB (as of 0.7.5)
  $0 status >/dev/null &&  $0 restart
  rc_status
  ;;

    reload|force-reload)
  ## Exclusive possibility: Some services must be stopped
  ## and started to force a new load of the configuration.
  echo -n "Reload ProFTPD Server: "
  /sbin/killproc -HUP $proftpd_bin
  rc_status -v
  ;;

    status)
  # Status has a slightly different for the status command:
  # 0 - service running
  # 1 - service dead, but /var/run/  pid  file exists
  # 2 - service dead, but /var/lock/ lock file exists
  # 3 - service not running
  echo -n "Checking for ProFTPD Server: "
  checkproc $proftpd_bin
  rc_status -v
  ;;

    probe)
  ## Optional: Probe for the necessity of a reload,
  ## give out the argument which is required for a reload.
  [ $proftpd_cfg -nt $proftpd_pid ] && echo reload
  ;;

    *)
  echo "Usage: $0 {start|stop|status|restart|reload|try-restart|probe}"
  exit 1
  ;;
esac

# Set an exit status.
rc_exit |
chmod 755
/etc/init.d/proftpd
chkconfig --add proftpd
/etc/init.d/proftpd
start
For
security reasons you can add the following lines to /etc/proftpd.conf:
DefaultRoot ~
IdentLookups off
ServerIdent on "FTP Server ready."
Be sure to
comment out the following lines in order to allow ftp users to CHMOD:
# Bar use of SITE CHMOD by default
# <Limit SITE_CHMOD>
#  DenyAll
# </Limit> |
and restart
Proftpd:
/etc/init.d/proftpd
restart
Webalizer
To insta
webalizer, just run
yast2 -i
webalizer
Synchronize the System Clock
If you want
to have the system clock synchronized with an NTP server do the
following:
yast2 -i
xntp
Add an NTP
server
yast2
Select
Network Services -> NTP
Client:
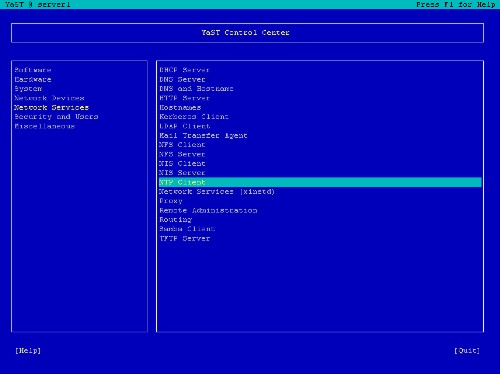
Then select
Automatically Start NTP
Daemon During Boot and enter the address of the NTP server. I
used public the Server with the IP address 192.43.244.18. Then select
Finish, Quit.

Install
some Perl Modules needed by SpamAssassin (comes with
ISPConfig)
yast2 -i perl-HTML-Parser perl-Net-DNS
perl-Digest-SHA1
On
To The Next Step...
The configuration of
the server is now finished, and we go on by installing ISPConfig on it.
ISP Server Setup - OpenSUSE 10 - Page
6
3
Installing ISPConfig
I will
install the current ISPConfig version. Download the current ISPConfig
version from http://www.ispconfig.org/downloads.htm to your
/tmp
directory.
Unpack the
ISPConfig-archive and change to the directory install_ispconfig:
tar xvfz
ISPConfig*.tar.gz
cd install_ispconfig
Start the
setup script
./setupThe
installer will now compile an Apache with PHP5 that will run on port 81
and is needed by the ISPConfig system itself. It will not interfere with
your existing Apache installation so you can go on unworried.
When the
ISPConfig Apache is built, a custom SSL certificate is built. Therefore
you are asked a few questions. You can accept the default values, or you
can enter new values there, this does not matter:
In step 7
(Encrypting RSA private key
of CA with a pass phrase for security [ca.key]) and step 8
(Encrypting RSA private key
of SERVER with a pass phrase for security [server.key]) of
the certificate creation process you are asked if you want to encrypt
the respective key now. Choose n there because otherwise
you will always be asked for a password whenever you want to restart the
ISPConfig system which means it cannot be restarted without human
interaction!
If the
compilation fails, the setup is stopped and all compiled files are
removed. From the error message you get you should be able to see the
reason for the failure (in most cases a package (like the MySQL header
files) is missing). Try to solve the problem and the re-run ./setup.
In case of
success the setup goes on:
Please choose your
language. This is the language of the ISPConfig
interface.
Afterwards
you are shown the ISPConfig licence (BSD licence). Please read it
carefully! You accept it by typing y. If you do not want to
accept the ISPConfig licence, type n, and the installation
routine stops.
As
installation mode I chose expert because i want to
set the website root to /var/www. When you are
asked for installation mode, type 2 and hit
return.
Now you are
ask if the daemons like postfix etc. are recognized correctly and for
their file locations, chose yes y.
When you
are asked:
Web-Root: /home/www
Is this
correct? [y/n]
choose
n and enter
/var/www as
Web-Root.
asked for some installation settings:
Please enter your MySQL
server: localhost
Please enter your MySQL
user: root
Please enter your MySQL
password: (Enter the password you chose when setting up
the MySQL Server)
Please enter a name for the
ISPConfig database (e.g. db_ispconfig):
db_ispconfig
Please enter the IP address of the
ISPConfig web (e.g. 192.168.0.1): 192.168.0.199
(Enter your IP here)
Now you are
ask to enter the host and domain of your server. If your server has a
host and domainname, enter them now. As this is a test install in my
local network, I leave the host empty and enter my IP address instead of
the domain.
Please enter the host name (e.g.
www):
Please enter the domain (e.g.
xyz.de): 192.169.0.199
Please select the protocol (http or
https (SSL encryption)) to use to access the ISPConfig system:
1)
HTTPS
2) HTTP
Your Choice: 1
After you
have answered the questions ISPConfig should be duly installed. If you
indicated www as
host and xyz.com
as the domain during the installation, you will find the ISPConfig
interface under https://www.xyz.de:81 or
http://www.xyz.de:81. Here
you can login first with the user name admin and password admin. It is recommended to
change the password immediately! This can be done in the ISPConfig web
interface under Tools ->
Change password.
Then go to
Management -> Server ->
Settings in the ISPConfig control panel and tick the Maildir checkbox on the
EMail
tab.
If your
server has more than one IP address, please check if your additional IP
addresses have been correctly detected by the installation routine under
Management -> Server
->
Settings on the tab Server -> IP
List.
| 


