| Evolution - Setting up an Account 
20 Jan 2005
In the recent past, we have discussed Evolution as an outstanding choice to
use as an email client. It is exceptionally robust, being of commercial-grade
caliber. It has many great features and options. To further explore Evolution, I
am writing a series of articles on its use and configuration. There is quite a
bit to go over, it being a fully-loaded email client.
The first that you run Evolution, you are presented with an account setup
wizard. The wizard is great, but you will probably have to enter accounts
manually sooner or later. This time around, I'd like to go through the basics of
doing just that. Let's go ahead and fire up Evolution.
- Go into the TOOLS menu and select SETTINGS:
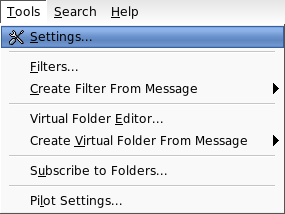
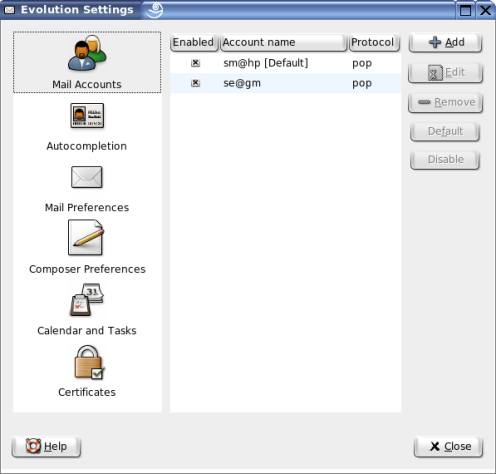
This will bring up the EVOLUTION SETTINGS box. Down the left side there are
different options listed. Select the MAIL ACCOUNTS option. On the right, you
will see a list of accounts that are already set up in Evolution:
This will bring up a box that looks very familiar for anyone who's been
through the account setup wizard:
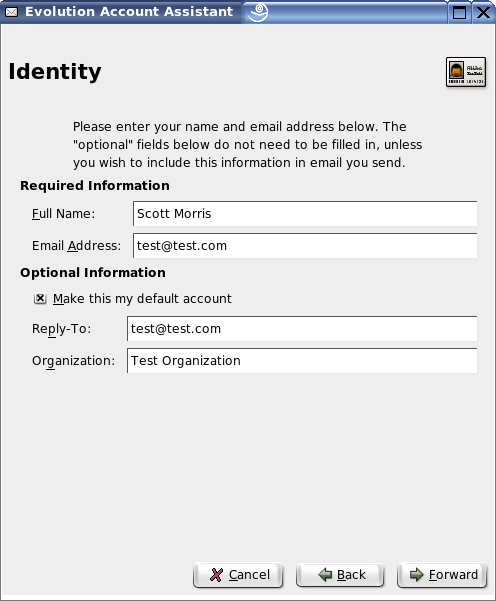
- Fill in your name and email address.
You'll fill in your name, email address, an optional reply-to address and
organization. If this is the main account you will be using in Evolution, check
the box that says, "Make this my default account."
- When finished, click FORWARD. Another screen appears:

- Fill out the account information for receiving email.
You will get the information on this screen from either your system
administrator or your ISP. This data consists of the server type, the host from
which you will receive your email, your username, whether or not to encrypt the
connection, the type of authentication, and whether or not to store your
password.
- When you are finished filling out this page, click FORWARD.
This takes you to a new screen:

I like to have Evolution check my email every 15 minutes for some accounts
and more often for others, depending on the account. If you receive email from
the same account on two or three different machines, you may wish to check the
"Leave messages on server" box. If you wish to enable support for all POP3
extensions, leave the respective box unchecked.
- Fill out this page. When you are satisfied with your settings, click
FORWARD.
This next page is where you will tell Evolution how you wish to send
email:
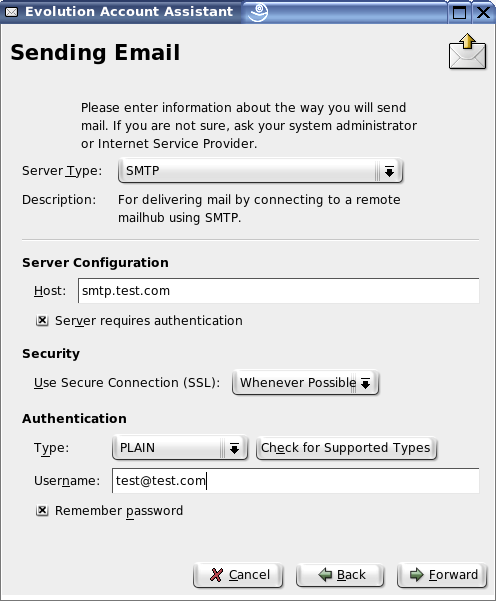
Most of the time, the server will be an SMTP server. Once again, you will get
most of the information you need on this screen from your system administrator
or ISP. Put in the server that you use to send email. If you require a secure
connection, make the appropriate selection in the "Use Secure Connection (SSL)"
drop-down box. Fill in your username. Check the "Remember password" box if you
would like Evolution to store your password. This way, you won't have to enter
it in every time you send an email.
- When you have all the settings entered, click FORWARD to go to the next
screen:
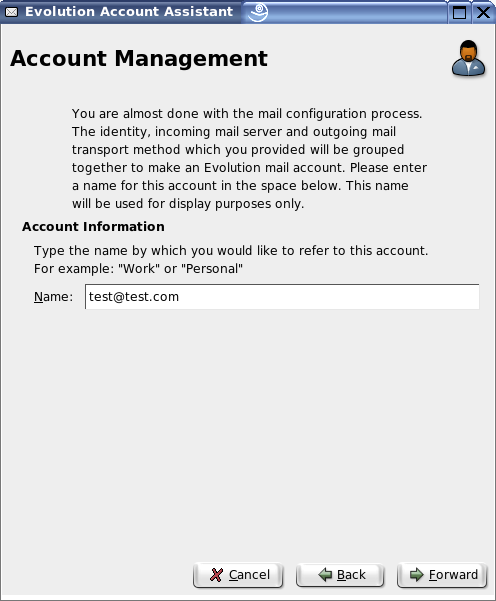
Give the account a name. This is the name that is in the window with the list
of accounts. It can be anything, so long as it helps you remember which account
it is.
- When you have given the account a name, click FORWARD:
The account setup is now complete:
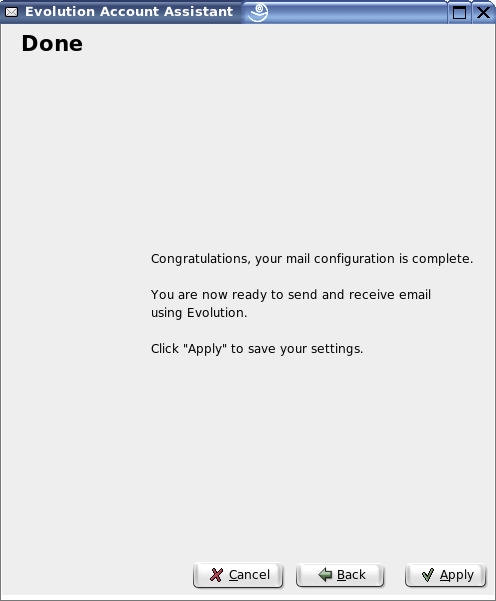
- Click APPLY to finish and add the account.
The new account now shows up in the MAIL ACCOUNTS list with the name you gave
it:

If you wish to change which account is the default, select the account and
then click on the DEFAULT button at the right.
Setting up an email account doesn't have to be technical and challenging.
Fortunately, in Evolution it is very easy to creat an account. Most of the
processes of using Evolution are equally simple.
| 


